Heading Hand and Frame Drums
(How to apply heads on wood shell hand and frame drums)
Kenne Thomas
Need a fix? New head? Tuning? (Jembe/Ashiko/Frame drum/Dun dun)
Click here to email for a Drum Repair request
For heading, or reheading, drums, frame or shell, I have found that, when glueing, or tacking heads, hose clamps, found at hardware stores nation, and world wide, are very suitable and effective for securing the head on the shell. This method, which I originally learned from Dr. D. P. Eyler, of Moorhead State University, Mn., is well suited for this job.
For glue, craftsmen in Japan use a mixture of carpenter's glue, similar to the wood glue available in the U.S., and sawdust from the drums they carve. This has been done for centuries, I was told in Japan by Taiko artisans, and holds up extremely well, as evidenced by the fine drums which have lasted to this day in playing condition from ages past.
Tacks, with a rounded head, are best suited for securing heads and playing ease. A width gauge, such as one used for wire, can give you an accurate reading of the actual depth of you drum's walls. The pin length for shell penetration should be checked for adequate depth but not to pierce the inner wall of your drum. A shallow pin depth may also cause pulling due to the duress the head may endure. If you must use flat head tacks check each one to see that none of them has any upward flair which may cause discomfort or injury in performance.
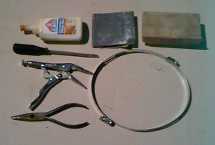 Hose clamps come in sizes from small to large, or long. For heads 10 inches, (25.5 cm), in diameter, or more, two hose clamps may be fastened together to circle the rim for a good fit. When using two, or more, hose clamps, care must be taken to insure that each one is tightened equally to the other(s). Just as one would tighten lugs on a conga, or snare drum, equal distribution of torque will insure balance of pressure. The clamps must not be overtightened either. This may seem obvious but the torque on the clamp screw can be deceiving. When preparing to use hose clamps form a ring with your clamps and place it over the lip of your drum to see how much clearance area you have. A good spacing for added head clearance would be about 1-2 cm.(3/4 in.). This will allow you to place the head on the bowl and have enough room to lower the clamp over it and tighten it securely.
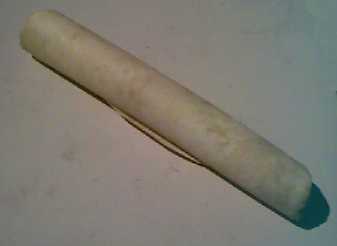
To begin the heading process, soak the head sufficiently to saturate it entirely. This is important to ensure that the head is supple enough to pull over the bowl and shell lip smoothly. It is assumed that you have measured the new head for bowl diameter and skirt length. The skirt length should be a minimum of 2-3 cm. (1 in.), over the size of the clamp height. Check to ensure that no burrs or spikes are protruding from the lip that may cause rips or tears from underneath the head. Sand the lip, with a fine grade sandpaper, if you notice any blemishes on it. Be sure to sand very evenly so as not to get an uneven ridge. If your drum HAS an uneven ridge you may want to sand, to level it out. Some authentic drums are naturally uneven so it is up to you whether or not you want to alter the original design. At this point you may also want to check for any shell cracks which may have been hidden under the previous head. Fill them with the above mixture of carpenters glue and let it dry before heading your drum.
Glue spills can be wiped up right away. You can sand any excess that is on the lip just before you head your drum.
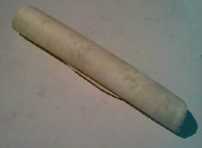
If you are glueing, apply your adhesive on the upper and lower lip area abundantly to ensure that as much head to shell contact is made as is possible at the glued area. Now place the damp head over the bowl and seat it on the lip. You can smooth the skirt out, along the top of the shell, by hand. If this is done following glueing, rub smoothly and check that no air bubbles are present. While smoothing the skin, place the hose clamp(s) over the circumference as evenly as possible and press it down on the skirt of the skin.
 When you are satisfied that the clamp is firmly fitted and balanced on the shell, begin to tighten it. After tightening a little, start to pull the skin under the binding to stretch it out over the bowl. Tighten a little more and check the fit and balance. When you are satisfied that everything is even, and the skirt is pulled down as much as it should be, tighten it to secure it before tacking, or, to let it sit and dry. Remember that the skin is wet and WILL shrink some when the moisture evaporates, tightening the head even more. If the skirt begins to "crimp" when you are tightening the head on the rim then you may have overtightened the clamps. Only enough pressure to keep the head firmly in place is necessary.
 You must be sure that enough head protrudes under the clamp binding to seat the head on the rim. I would recommend a minimum of at least 2-3
centimetres, about one inch, for ample area to pull. A flat mouth plier would be optimum but regular pliers may be used. Be sure to cover the teeth of standard pliers, if you use them. Several layers of masking tape or even cotton cloth will do so no tooth marks are made on your head. Of course if you plan to trim this area of head off of your finished drum, the teeth marks won't matter.
You must be sure that enough head protrudes under the clamp binding to seat the head on the rim. I would recommend a minimum of at least 2-3
centimetres, about one inch, for ample area to pull. A flat mouth plier would be optimum but regular pliers may be used. Be sure to cover the teeth of standard pliers, if you use them. Several layers of masking tape or even cotton cloth will do so no tooth marks are made on your head. Of course if you plan to trim this area of head off of your finished drum, the teeth marks won't matter.
For mounting tacked heads, the area above the binding is also important. This area depends on the size of the tack which you are using. The head of some tacks, such as ones used on odaiko, can be as much as 10 or more centimeters in diameter. It should be obvious that you don't want to apply tacks OVER the clamp binding so you have to allow for a few centimeters under the tack head area also.
Skins are easily pulled under the binding when they are damp, and the metal does not cause any abrasions on the skin, although you will notice the little rectangle shapes on the skin where the clamp is in place. I have not found these to be a problem as the clamps are not sharp edged and don't make indentations, only a slight relief on the edge of the skin, completely away from the playing surface.
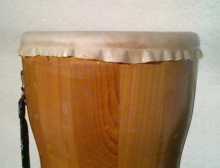
If you are tacking, do it carefully, after the clamps have been firmly set and tightened. Placing some type of brace, under the hammering area, will insure that the shell is not damaged or put out of round. Hammer tacks down securely on the shell but not so as to cause an impression in the skin by the tack head. It would be wise to measure the circumference of the drum and divide it evenly for tack distribution, so you don't run into the situation of tacks too close in places, or with gaps in their spacing. Before tacking, place a tack upside down on the skirt area so you can see how much area you need to place the point DOWN from the lip. You don't want to make the mistake of having the head of the tack too close to the rim or over it. I would suggest half a head length, for frame drums, and a full head length, for shell drums. This is taking into account performance on the instrument and playing it with your palm touching the rim area. You don't want to hit the tack in performance when executing a slap if it can be avoided.
If enough skin is used for the skirt, the clamps could be placed farther away from the tacking area, or the gluing area. This would allow the extra skin, where the clamp is placed, to be sliced off of the final fitted head, if desired. The consistency of the metal also adds to the
uniformity of the form of the tacked, or glued area, on the shell. This is assuming that the shell and rim are uniform in their circular dimensions initially before (re)heading. The clamp could be bent and modified to fit into a crease a drum may have, if it does have an out of round figure. But that may not be completely necessary, as the head, tacked or glued, will probably fit and adhere to a slightly out of round shell just as well. Hose clamps have an added advantage of being side screw tightened. The driver is angled away from the instrument shell avoiding the possibility of scratching the shell or puncturing the head, with careful toolmanship.
It should be noted however that with barrel shaped drums there will be a slight angle at the area where the clamp is placed. This is unavoidable but not of dire consequence unless you are tightening your head using extreme pressure from the clamp. Then you will have a line on the head where the clamp metal is placed. If too much pressure is applied the clamp could possibly cut into the head, if it is thin. So, you will have to deliberate and choose whether this method is appropriate for your heading needs.
This article refers to glueing and tacking and the securing of small and medium sized heads specifically. Unfortunately it does not apply to laced drums. The problem addressed is how to secure the head on the rim to let the glue dry, or, apply tacks on a stretched, non-tunable head. There is no way, that I know of, to apply this technique to diamond lacing drum.
Some drums that, applying the head with hose clamps, would be useful on are : Taos frame drums, Arabic Dumbec, Japanese Taiko (sm.), African Ashiko and Kenkeni, Chinese Tangu, Brazilian Puita (wooden), and the various sizes of tamburims, pandiero, and tambourines, to name a few.
I hope you have success with your (re)heading. Tacking is not as hard as it may seem if done in a measured manner. Glueing, although seemingly messy, is an easy clean up job.If there are other benefits, or problems dealing with (re)heading, or from using hose clamps, I look forward to
hearing from readers, or seeing them discussed in trade journals.
TOP
Front
Return to Publications
Djembe-L FAQ
Need a fix? New head? Tuning? (Jembe/Ashiko/Frame drum/Dun dun)
Contact Kenne Thomas
by email
copyright © 1999 - 2007 OFFICE KZ Kenzongs Music
All Publishing Rights Reserved
Site created by
Alternative Designs
 Hose clamps come in sizes from small to large, or long. For heads 10 inches, (25.5 cm), in diameter, or more, two hose clamps may be fastened together to circle the rim for a good fit. When using two, or more, hose clamps, care must be taken to insure that each one is tightened equally to the other(s). Just as one would tighten lugs on a conga, or snare drum, equal distribution of torque will insure balance of pressure. The clamps must not be overtightened either. This may seem obvious but the torque on the clamp screw can be deceiving. When preparing to use hose clamps form a ring with your clamps and place it over the lip of your drum to see how much clearance area you have. A good spacing for added head clearance would be about 1-2 cm.(3/4 in.). This will allow you to place the head on the bowl and have enough room to lower the clamp over it and tighten it securely.